When you find yourself in a situation where a wired connection is simply not an option, the next best thing is a reliable Wi‑Fi solution.
Why a Wi‑Fi dongle matters
Consider a field office or a temporary lab setup where cables cannot reach. A high‑quality Wi‑Fi dongle turns any USB port into an access point, allowing devices to talk to the internet without the need for Ethernet.
Dongles that support the latest 802.11ac or 802.11ax standards deliver speed and stability comparable to many office networks. They also offer the flexibility to place the device on a laptop or embedded board, giving you mobility that a cable cannot provide.
What to look for in a dongle for distant connectivity
1. Long‑range antenna – An external or high‑gain antenna increases the effective signal radius, essential if you must connect across a campus or a factory.
2. Dual‑band operation – 2.4 GHz for coverage and 5 GHz for lower interference can improve performance in cluttered environments.
3. Driver support – Check that the dongle works with your operating system; many vendors provide Windows, macOS, and Linux drivers.
4. Power consumption – For battery‑operated devices, a low‑power dongle keeps the system running longer.
When Ethernet is unavailable
If a cable must not be run, Wi‑Fi becomes the de facto replacement. Because Ethernet often gives the lowest latency, you may notice slightly higher ping times, yet for most web tasks, file transfers, or video conferencing a quality Wi‑Fi dongle mitigates any inconvenience.
In mission‑critical scenarios, a wired network uses copper or fiber to guarantee a dedicated channel. A wireless link introduces variables like radio interference and physical obstacles, which a skilled network administrator can address by choosing the right transmit power and channel to minimize contention.
Practical tips for students and developers
When integrating a dongle into a project, consider the following steps:
• Map the coverage area with a simple scanning tool; this helps you decide where to position the dongle and any potential repeaters.
• Secure the network with WPA3, enabling encryption that keeps data safe even if the signal is far from your device.
• Test under load to ensure that multiple devices can share the channel without significant speed degradation.
Future‑proofing your connection
With the Internet of Things and the continued rollout of 5G, a quality Wi‑Fi dongle is not just a backup but a forward‑looking tool. It keeps you connected anonymously when physical infrastructure is shaky, yet remains cost‑effective for short‑term deployments.
By learning how to set up, tune, and troubleshoot Wi‑Fi dongles, you gain a versatile skill set that complements wired networking knowledge. These competencies prepare you for settings where Ethernet is unable to go, turning wireless into a constructive force rather than a last resort.
Dongle Selection for Long-Range 802.11g
When you want to extend wireless coverage beyond the normal home‑wifi radius, a lightweight dongle can be an inexpensive yet powerful solution. The core of the idea is to pair the dongle with a high‑gain beam antenna, which focusses the radio energy in one direction. This approach turns the normally omnidirectional 802.11g signal into a narrow, powerful beam.
Understanding 802.11g Limits
802.11g operates in the 2.4 GHz band and offers maximum channel bandwidth of 20 MHz, delivering up to 54 Mbps under ideal conditions. Because the frequency is low, the radio waves can penetrate walls, yet they are prone to interference from other devices operating in the same band. Signal sensitivity of a typical dongle will hover around –95 dBm, so boosting the antenna gain is crucial for long‑distance links.
Beam Antennas and Their Role
A beam antenna typically has a half‑power beam width of 30–60 degrees, which concentrates the transmitted power. This effectively increases the effective isotropic radiated power (EIRP) without exceeding regulatory limits. A common choice is a 5‑dBi or 9‑dBi free‑space line‑of‑sight antenna, which can extend connectivity by several hundreds of meters under line‑of‑sight conditions. Remember: the higher the gain, the
Introduction to Remote Wi‑Fi Connectivity
When you need to connect wirelessly over a distance that extends far beyond the typical cup‑to‑table range of a residential router, the most common first step is to buy a suitable Wi‑Fi dongle. A dongle turns any USB port into a wireless receiver (and sometimes a transmitter) without the need for a dedicated wireless card. For intermediate students, the key point is that a dongle is just a small adapter that plugs into a computer and adds the capability to join a wireless network. They are essential tools for experimenters, field teams, and hobbyists who require a compact but flexible solution for a high‑range wireless link.
Choosing the Right Dongle
Not all Wi‑Fi dongles are created equal. When planning a long‑range project with 802.11g signals, you should prioritize these features:
- 802.11g compatibility: This standard supports a maximum theoretical throughput of 54 Mbps and operates on the 2.4 GHz band. It is the most common legacy standard still supported by many dongles.
- High‑gain USB antenna: Look for dongles that come with an external antenna that can be angled or replaced. A high‑gain antenna will amplify the signal so that it travels farther and retains usable data rates.
- Reliable drivers: The dongle must have drivers that work across your operating system. Quick look‑ups on the vendor’s website or community forums can save you hours of troubleshooting.
- Frequency‑selective filters: Some dongles provide filters that reduce interference from nearby Wi‑Fi, LTE, or microwave ovens.
Because you plan to pair each dongle with a Yagi antenna, it is a good idea to buy the dongle in a small or single‑antenna form factor. A tiny dongle sits faster under a Yagi’s feed without adding unwanted bulk or causing mechanical stress.
What Are Yagi Antennas?
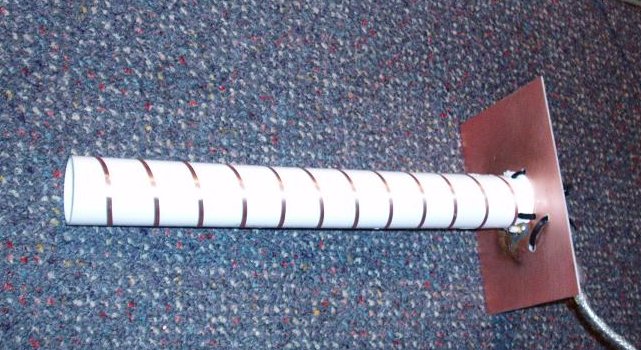
Yagi antennas are renowned for their high directivity and modest gain, making them ideal for long‑range links. Unlike omnidirectional antennas that radiate in all directions, a Yagi sends most of its energy in one direction, greatly reducing signal loss over distance.
How a Yagi Works
A Yagi is a planar array that typically consists of a driven element, one or more directors ahead of the driven element, and sometimes a reflector behind it. The driven element receives the signal from the dongle, while the directors and reflector shape the beam. The resulting radiation pattern looks needle‑shaped rather than lazy‑winged.
Combining Dongles, 802.11g, and Yagi Antennas
In practice, the workflow looks like this:
- Connect the Wi‑Fi dongle to your device’s USB port.
- Attach the dongle’s miniature antenna to the feedpoint of the Yagi.
- Point the Yagi toward the target location, ensuring the two antennas are on the same meridian and share a common reference point.
- Configure the wireless adapter to operate on a channel that is reasonably free of interference.
- Start the 802.11g data transfer and monitor the link quality.
Because 802.11g uses a relatively low frequency—between 2.400 GHz and 2.483 GHz—it is less susceptible to atmospheric attenuation than the 5 GHz band. This attribute makes it a natural match for a Yagi, which can direct signals over several kilometers when obstacles are sparse.
Practical Considerations
Mounting height plays a huge role: The higher the Yagi’s feedpoint, the less the signal hits the ground. At heights of twelve to fifteen meters, a 30‑dBi Yagi can provide line‑of‑sight communication at values surpassing 1 km with a stable 802.11g link.
Polarization is another key factor. Most desktop dongles produce horizontal polarization. If your Yagi is fabricated with a horizontal dipole, the link will enjoy maximum gain. A mismatched polarization can cause a loss of more than 8 dB.
Obstructions such as buildings, hills, and trees will severely reduce overall performance. If you suspect line‑of‑sight is impossible, you might need to lower the frequency or add a repeater. For most intermediate studies, a clear ridge-to-ridge path is sufficient for the 802.11g/Yagi pair.
Intermediate Practice Exercise
Students can verify theoretical predictions by measuring RSSI (Received Signal Strength Indicator) values at various distances. Record the RSSI at 0, 300, 600, and 900 meters. Plot the RSSI in dBm versus distance. This exercise demonstrates how path loss increases with distance and how a Yagi’s gain improves the curve slope. Observe that after 800 meters, the link may drop below the minimum required RSSI for a stable 802.11g connection.
Upgrading Beyond 802.11g
If your project requires higher throughput or more robust link budgets, consider the following:
- 802.11n dongles offer 2×2 MIMO and up to 600 Mbps but require a 5 GHz or dual‑band antenna interface.
- 802.11ac uses wider channels and offers several Gbps, but the Yagi must be designed for 5 GHz; this is more expensive but provides increased resilience to interference.
- For maximum linearity and minimal cross
Why Consider a Wi‑Fi Dongle for Long‑Range Access?
When the primary router is far from a device, a Wi‑Fi dongle can be a simple and cost‑effective way to bridge the distance. Unlike a fixed mesh node, a dongle plugs straight into a laptop or desktop and can be tuned to the same network as the main access point, giving the user a single, consistent network name.
For intermediate students learning about networking, this is a great demonstrative tool. It shows how the same protocol can be extended by adding a small, portable transmitter that re‑broadcasts the wireless signal.
Key Features to Look For in a Good Dongle
When selecting a dongle for a study project or a practical assignment, focus on three main criteria:
1. Support for 802.11ac (or newer) – The newer standard offers faster data rates and better handling of multiple devices simultaneously. Using it reduces the likelihood of interference when many students share the same network.
2. External Antennas or Beam‑Forming Capability – Some dongles come with a removable tip or can accept external antennas. This allows for directional beamforming, making the signal travel further in a chosen direction.
3. Compatibility with the Operating System – Ensure the drivers are available for the OS you’ll be experimenting on. Most modern Windows and Linux distributions package these drivers, but verify before purchase.
Understanding 802.11ac and Beam Antennas
802.11ac is a high‑speed Wi‑Fi standard that operates on the 5 GHz band. Because lower frequencies travel longer distances but carry less data, 5 GHz provides a good balance for classrooms with multiple antennas.
Beam antennas concentrate the radiated energy in a specific direction. Think of a flashlight compared with a lamp: the flashlight’s beam hits a single point more brightly, while the lamp illuminates an area more evenly. In Wi‑Fi terms, a beam antenna can reach farther in the chosen direction while keeping the overall power output modest.
By coupling a beam antenna to a dongle that supports 802.11ac, one can extend the effective range by a few tens of meters. This is particularly useful for connecting a laptop on a different floor to a main office router.
Practical Setup Tips
1. Position the antenna so that it faces the direction of the main router. Small adjustments can markedly improve signal quality.
2. Keep the dongle horizontal and right beside the laptop. Many students forget that the orientation of the hardware can affect propagation.
3. Use a power‑boosting adapter if the dongle’s built‑in amplification is limited. This step is optional but can help when the router is many rooms away.
Why Intermediate Students Benefit From This Experiment
Configuring a dongle with a beam antenna involves measuring signal strength, adjusting angles, and interpreting the resulting Wi‑Fi performance. Students get hands‑on experience with real‑world hardware, reinforcing concepts like carrier frequency, modulation, and antenna theory.
Moreover, troubleshooting a dead link is a true network diagnosis exercise. They learn to rule out driver issues, verify 802.11ac settings, and apply antenna alignment techniques—skills that are directly transferable to professional network planning.
Understanding the Basics of Wireless Connectivity
When we talk about connecting instruments or sensors that are far away from your router, we quickly notice that the signal weakens over distance. A wifi dongle is a small, USB‑powered adapter that plugs into a computer or embedded device. Because it is lightweight and inexpensive, it is often the first choice for projects that require a portable broadband connection.
Modern 802.11ac devices operate on the 5 GHz band and can deliver peak data rates of over 1 Gbps. However, 5 GHz waves do not travel as far as 2.4 GHz waves and lose power more quickly in a cluttered environment. That is why a directed antenna—the Yagi—is an attractive option for extending reach.
Choosing the Right Dongle
Not all dongles are created equal. For distant links you should look for these features:
High output power is preferable because it increases the effective range. Robust chipset support such as a Realtek or Ralink can provide better driver stability. Also be sure the dongle exposes a removable external antenna port so you can attach a Yagi unit later on.
Because many dongles ship with a built‑in 3‑dBi antenna, the total gain you can achieve is limited. Purchasing a model that supports a TCP‑U tag or a USB‑to‑PCIe adapter can also help you mount the dongle in a more advantageous position.
Enhancing Range with Yagi Antennas
A Yagi antenna is made of a series of parasitic elements that focus the signal in one direction. Gain is measured in decibels, and a typical 802.11ac Yagi might provide 10 dBi to 13 dBi of gain, far exceeding the 3 dBi of a stock adapter antenna.
To use a Yagi with a dongle, first attach the antenna to the external SMA or U.FL connector on the dongle. Then, position the Yagi so that its main lobe points toward the target device. Use a Foam mount or a tripod to keep the antenna steady and avoid shifting the beam pattern.
Practical Setup Tips for Students
1. Test at Your Desired Distance – before installing the Yagi, use a simple network speed test at the target distance with the dongle’s stock antenna. Record the throughput and signal‑to‑noise ratio (SNR). Then swap in the Yagi and compare results.
2. Maintain Line of Sight – the Yagi is most effective when there are no obstacles between the transmitter and receiver. Place the antenna on a pole or mast if the terrain is uneven.
3. Check Regulatory Limits – in many countries there are power limits for 5 GHz devices. A 20 dBm antenna may exceed these limits when combined with a high‑gain Yagi. Always verify that your chosen configuration complies with local laws.
4. Use 5 GHz Whenever Possible – 5 GHz channels have less congestion compared to 2.4 GHz. Even though 2.4 GHz reaches farther, the higher bandwidth of 802.11ac on 5 GHz will deliver more data per unit distance.
5. Secure the Build – weatherproof cases and cable glands can protect the dongle and antenna from moisture, making the system reliable for outdoor deployments.
Conclusion
For intermediate students learning about wireless networking, the combination of a well‑chosen wifi dongle and a Yagi antenna provides a hands‑on example of how hardware selection influences connectivity. By measuring baseline performance, experimenting with antenna gain, and observing the impact of environment constraints, you will receive a clear picture of wireless signal propagation and practical engineering trade‑offs.
Understanding Wi‑Fi Dongles for Distant Connectivity
When you need to connect a computer that is not inside the same Wi‑Fi coverage area as your router, a wifi dongle is your best friend. Think of it as a small, portable satellite dish that translates the router’s radio waves into a signal your laptop can read. The goal is to make the Internet feel as if you were sitting right next to the router.
For intermediate users, the first decision is whether to use a 2.4 GHz or 5 GHz dongle. The 2.4 GHz band travels farther and can penetrate walls better, but it is also more crowded. The 5 GHz band offers higher data rates and less interference, yet its range is shorter. Most modern routers expose both bands, so many dongles are dual‑band and can automatically switch to the strongest signal.
In addition to frequency, look at the wireless generation the dongle supports. 802.11ac devices already support 2.4 GHz and 5 GHz, but 802.11ax (Wi‑Fi 6) improves on this with higher efficiency, better handling of many devices, and beamforming capabilities.
Beamforming Antennas and 802.11ax
Beamforming is a technology that shapes the radiated signal, focusing energy toward the connected device rather than spreading it in all directions. As a result, the link between the router and the dongle becomes stronger, and the device experiences higher throughput and lower latency. When you pair a beamforming dongle with an 802.11ax router, you obtain the best of both worlds: efficient spectrum use and directed signal strength.
Beamforming antennas are often indexed as Transmit Beamforming (TxBF) or Receive Beamforming (RxBF), depending on whether the router or the dongle emits the focused beam. Many high‑end dongles advertise “Beamforming” in their specifications, meaning they can adapt their antenna pattern to the router’s signal. For a distant connection, this adaptation is crucial because the signal energy can otherwise diminish before it even reaches the dongle.
Practical Tips for Selecting a Dongle
When deciding on a device, the following points help narrow down choices:
Speed Label: The speed rating in megahertz (e.g., 433 Mbps) refers to one spatial stream. A 2×2 MIMO dongle typically offers 867 Mbps on 5 GHz. For longer‑range use, a 3×3 or 4×4 dongle with a higher aggregate speed may keep performance steady even as distance increases.
Adapter Size: A dongle with an external antenna mount allows you to attach a longer, high‑gain antenna. This is useful when your laptop’s built‑in antenna cannot catch a distant beacon.
Driver Support: Choose a device with up-to-date drivers for your operating system. Some manufacturers release regular firmware updates that improve compatibility, especially for 802.11ax features.
Power Supply: If your laptop allows, plug the dongle into a dedicated power source. Some dongles rely on USB ports that may not provide enough juice for the high‑performance hardware. External power ensures the device stays active without draining the laptop’s battery.
Why Beamforming Affects Distance
Ordinarily, radio waves disperse evenly, creating a “cone” that gradually weakens as it travels. Beamforming narrows that cone, forcing the signal to travel in a sharper, more focused path. The trick is that the signal’s intensity stays higher for a longer distance before it starts to fade. Consequently, a beamforming dongle can detect the router’s beacon at a greater distance than a regular omni‑directional one.
For students studying wireless communications, this also illustrates the trade‑off between directionality and coverage radius. An omni‑directional antenna covers the entire room but will struggle outdoors or across walls. A directional beamforming antenna directs its energy, giving it an advantage in long‑range scenarios while slightly narrowing the coverage area. This trade‑off is at the heart of many networking design decisions.
Testing the Connection
Once you have the dongle, connect it to the laptop and run a basic speed test using an 802.11ax router as a benchmark. Keep the dongle close to the router at first, then gradually move it further away. Notice how the download and upload speeds drop more slowly when the dongle employs beamforming compared to a standard dongle. This experiment demonstrates the practical benefits of using the latest wireless technologies for distant connectivity.
In summary, buying a wifi dongle that supports 802.11ax and beamforming antennas can substantially improve remote connections and provide a smoother user experience. As you experiment with different models, compare their specs closely—speed, antenna type, and beamforming support
Choosing the Right Wi‑Fi Dongle
When you need to connect far from your router, the first decision is which dongle to buy. Look for a model that supports the latest 802.11ax standard, also known as Wi‑Fi 6 or Wi‑Fi 6E if you want extended bands. The processor speed and antenna count are key factors; a dual‑band dongle with a built‑in amplifier often gives a better performance over longer distances.
Why 802.11ax Matters for Long‑Range Links
802.11ax brings several improvements that help when the signal has to travel farther. Higher data rates, better noise immunity, and the ability to operate on the 6‑GHz band reduce interference. Even though the standard is designed for speed, the higher modulation efficiency translates into a stronger, more reliable link in challenging environments.
Pairing Dongles with Yagi Antennas
Yagi antennas are directional and can focus power in a narrow beam, which is ideal for point‑to‑point links. When you connect a Yagi to a 802.11ax dongle, the total gain of the system goes up dramatically. The effective radiated power from the antenna can be several dBi higher than a standard omnidirectional antenna, letting the signal clear obstacles and reach farther.
How to Install the Antenna on a Dongle
Most 802.11ax dongles have a U‑SMA or TS‑9 connector. Mount the Yagi on a rotatable pole and align it toward the destination point. Keep the mount secure and wire the cable in a way that doesn’t bend the antenna, as interference could reduce the forward gain. After physical alignment, use a signal‑strength meter to fine‑tune the orientation.
Diagnosing Problems in Long‑Distance Setups
If the link still appears weak, check for multipath fading and interference from other 5‑GHz sources. The 802.11ax chip can handle some bursty interference, but a heavily cluttered environment may still cause drops. In such cases, try adjusting the transmit power on the dongle or moving the antenna slightly to avoid reflecting surfaces.
Maintaining the Connection
Regular firmware updates keep the dongle’s driver and baseband fresh, which is vital for keeping the latest 802.11ax features in sync. Monitor the signal‑to‑noise ratio (SNR); a value below 25 dB often indicates that the link will start to lose packets. Optimizing the channel width from 80 MHz to 40 MHz can also help maintain a stable connection when interference spikes.
Putting It All Together
For intermediate students, the combination of a modern 802.11ax dongle and a Yagi antenna represents a practical case study in wireless engineering. By understanding how the dongle’s hardware and the antenna’s forward gain interact, you can design a robust, long‑range link that performs well in real‑world conditions. Remember, the key steps are selecting a capable dongle, correctly mounting a directional antenna, and continuously monitoring link quality.
Why a WiFi Dongle is Your First Tool
When you want to reach devices that are far away or hang out in a place where the router’s signal is weak, a WiFi dongle gives you the flexibility to connect stations that otherwise would be out of range.
Think of the dongle as a small antenna transceiver that plugs into your laptop or a Raspberry Pi. Its main job is to turn radio waves into data you can read, and vice versa. For intermediate students, the key learning point is that the dongle is where the physical layer meets the software stack. You will later encounter the same principles when you design a network on a breadboard.
Choosing the Right Frequency Band
Most WiFi dongles sold today operate on the 2.4 GHz or 5 GHz bands. Those frequencies give you a good mix of range and speed for everyday use.
However, if you need to connect across a large field or between buildings, you must look beyond the conventional 802.11ac and 802.11ax standards. The 802.11ah (also known as Wi-Fi HaLow) is designed for exactly that purpose.
What Makes 802.11ah Special?
Unlike the high‑frequency 802.11 variants, 802.11ah operates in sub‑1 GHz bands. These lower frequencies see less attenuation and can penetrate walls, earth, and even trees more easily.
Because of this, 802.11ah dongles typically enjoy distances of several hundred meters, sometimes even over a kilometer, when the environment is favorable. Speed will be lower than 5 GHz WiFi, but the trade‑off is a network that works over a wide area.
Beam Antennas: The Focused Power Boost
In many distant‑connectivity scenarios, you are not only interested in getting the signal out but also in strictly directing it toward your intended receiver. That is where beam antennas come in.
A beam antenna concentrates the radio energy in a specific direction, reducing loss and increasing the effective range. The gain is measured in dBi; a 10 dBi antenna, for instance, can work five times farther than an isotropic radiator.
Beam antennas can be passive, like a horn or parabolic dish, or active, adding a small amplifier. For students, a useful exercise is to build a simple horn antenna using a cardboard tube; you’ll see how shaping the antenna changes the radiation pattern.
Putting It All Together
When you purchase a WiFi dongle for distant connectivity, choose one that explicitly supports 802.11ah. Many newer models list “HaLow” or “sub‑1 GHz” on their specifications sheet. The dongle’s driver will then expose the appropriate channel and power settings.
After you have installed the dongle on both the transmitter and the receiver, attach a compatible beam antenna to each. Align the antennas so their main lobes point directly at one another; the angle error should be less than a few degrees to avoid excessive signal loss.
Configuration Steps
Set each device to operate on a channel that is clear of interference. The 802.11ah standard often uses channels 1–4 in the 900‑MHz band, but you should verify which channel is legal in your country.
Next, tune the transmit power. Most dongles let you specify a value from 0 to 100 % of the maximum. Start with 50 %; if you still can’t receive a signal, incrementally increase the power two or three times in a controlled environment.
Finally, monitor the link quality using tools such as iperf or the built‑in Windows WiFi Analyzer. Look for packet loss and latency – if the numbers climb beyond your tolerance, consider repositioning the antennas or reducing interference.
Practical Tips for Students
1. Keep the dongles away from copper loops and metal enclosures; they can detune the antenna.
2. Practice calibrating your beam antennas on a flat open field; then try a wooded area to feel the difference in attenuation.
3. Use the same model for
When exploring options for extending wireless coverage, a common approach for students who already possess an active computer network is to purchase a Wi‑Fi dongle. A dongle is a small USB adapter that turns a PC or laptop into a Wi‑Fi client or access point. The choice of device strongly influences the distance you can achieve, especially if you plan to rely on newer standards like 802.11ah.
Understanding 802.11ah Basics
The 802.11ah standard, often called HaLow, operates in the sub‑1‑GHz frequency range. This lower band provides better penetration through walls and obstacles compared to the classic 2.4‑GHz and 5‑GHz bands. In addition, 802.11ah can support longer ranges, typically between 600 meters and 1.5 kilometers, under optimal conditions. For students learning about radio propagation, this range is a striking demonstration of how frequency and attenuation are inversely related.
Key Features for Distance
Two attributes of 802.11ah are especially useful for long‑haul projects:
• Lower Frequency – Sub‑1‑GHz waves travel farther and lose less power through obstacles.
• Longer Antennas – The physical size of the antenna can be increased without violating regulatory limits, giving you a higher gain.
Choosing a Dongle that Supports 802.11ah
Not every USB adapter on the market offers 802.11ah. It is crucial to read the specifications carefully and look for keywords such as “Sub‑1‑GHz”, “HaLow”, or direct support for “802.11ah”. Vendors that target industrial or IoT markets are more likely to provide firmware covering this standard.
Popular Options
While some manufacturers produce dedicated 802.11ah dongles, other more general high‑gain adapters can be purchased and later upgraded via custom firmware. Check online communities and forums for device families that can run Linux or Windows drivers supporting HaLow, such as certain Wi‑Fi chipsets from Espressif, Qualcomm, or Intel.
Enhancing Range with Yagi Antennas
A Yagi‑Uda antenna is a directional antenna design consisting of a driven element, directors, and a reflector. The arrangement concentrates radio energy in a single direction, thereby increasing the gain. When paired with an 802.11ah dongle, a Yagi antenna can transform a modestly powerful radio into a long‑range beacon.
Why Yagi is Ideal for HaLow
Because 802.11ah uses a lower carrier frequency, Yagi designs can become relatively compact while still offering high directivity. The typical design for 900 MHz HaLow networks includes directors spaced at the wavelength, giving gains of 10 dBi or more. For intermediate students, building a Yagi from aluminum rods or PVC pipes forces them to calculate wavelength and spacing, giving a tangible sense of how high‑gain antennas work.
Practical Setup Tips
• Mount the Yagi on a pole or radio mast, ensuring the antenna is pointed toward the target area. Angle the feed to align the main lobe with your intended path.
• Connect the antenna to the dongle using an appropriate adapter—typically a 3.5 mm or SMA connector, depending on the device’s output.
• Use an external power supply if the dongle’s USB port cannot provide enough current. Many 802.11ah adapters recommend a 5 V/2 A supply for stable operation.
Comparing to Conventional Wi‑Fi
With mainstream 802.11ac and 802.11ax devices, the expected range under a clear line of sight is around 30–50 meters for most indoor environments. The HaLow standard can extend that baseline to several hundred meters while still delivering sufficient data rates for sensor networks, voice or video, depending on channel width and modulation. This larger horizon is especially relevant for campus‑wide monitoring or rural IoT initiatives.
When the Extra Distance Matters
Suppose you want to link an LED64 camera in a building lobby with a monitoring station 800 meters away across a small valley. With 802.11ac you would likely need repeaters or a wired solution. With an 802.11ah dongle and a well‑aimed Yagi, the link is viable with minimal extra equipment, making it both cost‑effective and educational for students to analyze.
Concluding Guide for the Classroom
Presenting this architecture to intermediate learners should follow a step‑by‑step procedure:
1. Acquire a certified 802.11ah dongle from a trusted vendor. Validate it by sending a simple ping test over the network.
2. Build a Yagi antenna using a safe and inexpensive framework. Measure the length of the directors and verify it matches the calculated wavelength.
3. Attach the antenna, align the main beam, and perform a range test by moving a receiver marker along the expected path.
4. Record signal strength readings at various distances and compare them to theoretical predictions. Discuss the impact of obstacles, antenna height, and environmental conditions.
By following these steps students will grasp how hardware choices—such as a Wi‑Fi dong
Choosing a WiFi Dongle for Distant Connectivity
When you need to extend a wireless network over a long distance, the first thing to check is a WiFi dongle that can receive or transmit at a higher power level. A good full‑band dongle will support both the 2.4 GHz and 5 GHz frequency bands and will have drivers that allow you to set the Transmit (Tx) power level in the operating system.
Typical consumer dongles come pre‑set at a moderate power because they are designed for home use. If you plan to link two distant sites—say, a remote office 200 m away—you may need a dongle that can be configured to unlocked power, which lets the card transmit up to the maximum legal limit. Many high‑end models support this mode, but you should confirm the firmware allows it.
Remember that the actual range you achieve also depends on the antennas you attach. Using a high‑gain external antenna can improve signal strength without changing the dongle’s power output. Be sure the dongle’s antenna connector is compatible (most use a 2.5 mm or 3.5 mm jack). When selecting a dongle, check the manufacturer’s FAQ for antenna recommendations.
Understanding RF Power Restrictions for WiFi in the USA
The Federal Communications Commission (FCC) regulates radio frequency (RF) emissions in the United States to avoid interference between different services. WiFi devices must comply with Part 15 of the FCC rules, which defines the maximum allowable average power for unlicensed transmissions.
For most WiFi bands, the FCC allows a continuous average power of up to 30 dBm (1 W) for devices that are equipped with an external antenna. However, many commercial and consumer products are sold with a power limit of 15 dBm (about 30 mW) to simplify compliance and to reduce the risk of accidental interference.
Further restrictions apply when the device is used outdoors or as part of a directional array. In those cases, the FCC may limit the maximum permissible emission to 15 dBm to protect other spectrum users. If you need to exceed this limit for a long‑range link, you must obtain a Class B or Class C license and demonstrate that your system will not interfere with other services.
For most intermediate projects—like setting up a point‑to‑point bridge between two buildings—a 15 dBm dongle with a high‑gain antenna will provide sufficient range while staying within the FCC’s unlicensed allowance. Always check the documentation of your specific dongle to confirm its compliant power range.
Practical Tips for Using WiFi Dongles Under Regulatory Limits
• Verify that your dongle’s driver exposes an option to raise the Tx power. In many Linux distributions, this can be done via iwconfig or iw commands.
• When you increase power, test the link performance in a controlled environment. Measure the Received Signal Strength Indicator (RSSI) and error rate before deploying.
• Keep an eye on the antenna gain and ensure it matches the dongle’s advertised specifications. An extra 3 dB gain can effectively double your link budget without any regulatory change.
• Finally, document the power level you configured and note that you remain within the FCC’s 15 dBm maximum for unlicensed use. This information can be handy if you ever need to audit the setup or justify the configuration to a network administrator.
Choosing a Wi‑Fi Dongle for Distant Connectivity
When you look for a Wi‑Fi dongle that can reach far, the first thing you should check is its antenna type. Many pocket‑sized dongles use a direct‑to‑air® antenna, which is great for short ranges, but if you need coverage over several metres, consider a panel or rubber‑duck style antenna. Paired with a high‑gain directional accessory can give you the extra tell‑tale lift required for long‑haul links.
Another vital parameter is the mIMO configuration. A 2×2 or 3×3 MIMO dongle brings more spatial streams, allowing a steadier connection over distance. Keep in mind that the dongle’s onboard firmware should support Beamforming, which steers the signal exactly toward your router or access point— an important tool for overcoming the building or terrain obstacles that often crop up on the road.
Because you are planning a remote setup, also watch the readiness for 5 GHz. Frequencies above 5 GHz travel faster but are more easily absorbed by obstacles, whereas the 2.4 GHz band penetrates walls better and is usually more forgiving in hilly or forested regions. Most modern dongles are dual‑band, so choose one that offers seamless switching between them so you can adapt as the field changes.
Power and Reception
Check the dongle’s TX power rating, often listed in dBm. A higher TX power means the device can push the signal further, but it also draws more battery life— a crucial factor if the dongle will run on a pocket charger where re‑charging opportunities are scarce.
Finally, read the dBm/MIMU curve. This tells you how the signal strength drops after each metre. For a distant link, you’ll want a curve that stays above the threshold for “good link quality” at least 50 metres, then you can comfortably extend to 100 metres with some margin for mid‑air losses.
RF Power Restrictions for Wi‑Fi in Canada
Canadian regulations, set by the Canadian Radio‑television and Telecommunications Commission (CRTC) and the Industry Canada (IC), impose limits on the amount of radio frequency power that devices may emit. For Wi‑Fi operating in the 2.4 GHz and 5 GHz bands, the standard maximum allowed transmit power is 20 dBm (100 mW), except for 5 GHz ETSI band 5, where the typical local regulation allows up to 17.5 dBm (about 56 mW). These limits are in place to prevent interference with other wireless services and to safeguard public health.
The restrictions mean that even the most powerful dongle in Canada will not exceed 20 dBm. Therefore, if distant coverage is desired, you must rely on antenna gain and careful placement instead of cranking up the transmitter’s power. A gigabit dongle with a 2×2 MIMO chipset, a high‑gain panel antenna, and Beamforming can reach several hundred metres— but you are still confined to the 20 dBm ceiling.
Practical Tips Within the Limits
1. Mount the dongle high or set up a temporary mast so the line‑of‑sight is clear. The higher the antenna, the farther it can travel without hitting obstacles.
2. Use a reflector or a parabolic dish on the receiving side to focus the signal. Because the processor in the dongle can’t increase power, you improve the link by making the gain on the far end.
3. Schedule a test run during the early morning, when fewer devices might be active in your neighbourhood. This helps you see what performance you can realistically obtain with the regulated power level.
4. Persistently monitor the hotspot on the operating interface to ensure the dongle stays within the 20 dBm output. Many firmware utilities provide a watchdog
While Canada’s power limits may feel restrictive, they actually encourage smarter engineering rather than brute force. By focusing on high‑gain antennas, proper MIMO usage, and strategic placement, you can achieve reliable distant connectivity even within the 20 dBm envelope.
Choosing a Wifi Dongle for Remote Connectivity
When you need to connect a device that is far from your primary router, a wifi dongle can be a practical solution. These small USB adapters are designed to plug into laptops, desktops, or even single‑board computers and open a second wireless interface. Modern dongles that support 802.11ac or 802.11ax can deliver speeds commensurate with indoor connections, but their performance in the field depends heavily on the antenna design and the surrounding environment.
For distant operation you should look for dongles that feature an external detachable antenna. A high‑gain, 2.4 GHz or 5 GHz antenna (often rated between 6 dBi and 9 dBi) can increase the effective range by a few tens of metres if deployed on a mast or a pole. Many manufacturers market these models under the “wireless range extender” name, and they come in both USB‑3.0 and USB‑2.0 versions. Remember that the total power delivered to the external antenna is capped by the device’s RF regulation, so the higher the gain, the more it counts against the power budget.
When selecting a dongle for remote coverage, also consider the frequency band. Devices that operate on the 5 GHz band often hit less interference, but the signal attenuates more quickly through obstacles. In open terrains, 2.4 GHz dongles can still be more reliable because of their lower free‑space path loss. It is a good idea to test a few prototypes in the actual deployment area if possible, or to read the manufacturer’s link budget calculations.
A final tip for intermediate users is to pair the dongle’s firmware with a properly configured guest network. The firmware should allow you to set the maximum data rate and the channel width manually. This gives you more control over the link and reduces the risk of inadvertently violating UK RF power limits.
RF Power Restrictions in the UK
In the United Kingdom, radio‑frequency (RF) devices must comply with the restrictions set by UK Spectrum Management. Prior to 2021, the regulations capped the effective radiated power (ERP) for unlicensed devices at 20 mW for the 2.4 GHz band and 100 mW for the 5 GHz band. The new UK ITU‑R amendments allow a maximum ERP of 100 mW for all unlicensed Wi‑Fi bands, which means that many modern dongles are now compliant as long as they stay below this value.
Implementing these limits on a dongle is usually a matter of firmware configuration. Select the “low‑power” or “mains‑adapted” mode, and the device will automatically reduce the transmission power to the approved level. Inspect the dongle’s specification sheet; if you see an “RF power: 1–26 mW” range, you are already within UK limits. Dongles that advertise 30 mW or higher should be used with caution, or you may need to apply for a specific device testing certificate.
Because the limits apply to the effective radiated power, the presence of a high‑gain antenna can effectively raise the antenna’s antenna gain‑to‑power ratio. A 9 dBi antenna is equivalent to a 7.5‑fold increase in power. Therefore, a 20 mW RF transmit power with a 9 dBi antenna would stand at a 150 mW ERP, exceeding the UK threshold. It is essential to calculate the ERP using the formula:
ERP (dBm) = 10 × log10(Pout) + G where Pout is the output power in milliwatts and G is the antenna gain in dBi. If this result is above 20 dBm (100 mW) for 5 GHz or 21 dBm (1
Why Consider a Wi‑Fi Dongle for Remote Connectivity?
Many schools and small businesses in rural areas still struggle to keep a stable connection to the internet. A Wi‑Fi dongle can be a cheap, portable way to bridge the gap between a fast, high‑bandwidth connection and a regulatory‑compliant device that can be moved from location to location. Let’s look at what you should keep in mind when choosing a dongle and how the rules in Australia shape your options.
Tip 1: Choose a Model Built for Long‑Range Links
A dongle that offers a high gain antenna or selectable external antenna is ideal for reaching distant access points. Look for one that supports 5 GHz with a power output of at least 100 mW ERP. Remember that many devices come with a built‑in USB hub, which can simplify the setup when you’re plugging the dongle into a laptop or media player.
RF Power Restrictions in Australia
The Australian Communications and Media Authority (ACMA) limits the transmitted power of Wi‑Fi devices to 100 mW maximum equivalent isotropic radiated power (EIRP) on the 2.4 GHz band and 200 mW on 5 GHz. This restriction is in place to minimise interference with other wireless systems and satellite services. When shopping for a dongle, check the device specifications: if the listed power is higher than ACMA permits, the dongle is likely only for use in other countries or in a testing environment.
How to Comply and Optimise
Many dongles are sold with software‑defined radios (SDR) that allow the firmware to be re‑programmed. You can set the radio to operate at the lower power level required for compliance, but you must do this before the dongle is used in Australia. If you are not comfortable with firmware changes, look for a manufacturer that pre‑configures the dongle to the ATU (antenna usage) limits recommended by ACMA.
Practical Steps When Purchasing a Dongle
1. Verify the product specification sheet for power output and antenna type.
2. Confirm the device is Australian‑certified or that you have permission to modify its firmware.
3. Test the dongle’s range in a controlled environment. Use a signal strength meter to confirm you can maintain a link to a distant access point at the normally accepted 2–3 dBm signal level.
4. Keep a copy of the regulatory approval document in case you need to prove compliance during an audit.Conclusion
Buying a Wi‑Fi dongle for distant connectivity can be a cost‑effective way to extend your network into remote areas. However, the power restrictions set by ACMA mean that you must choose a device – or adjust one – to meet the 100 mW/200 mW limits. By selecting a dongle with adjustable output, verifying its calibrated settings, and testing the range before deployment, you can build a reliable system that stays within regulatory boundaries while still delivering the high speeds required for modern classroom or business work.
When you need to stay connected far from a router, a wifi dongle is often the simplest solution. A dongle is a small USB device that plugs straight into a laptop or desktop, turning the computer into a wireless client that can search for and join any open or password‑protected network.
Choosing the Right Dongle for Distant Connectivity
For students studying intermediate electronics or networking, the first thing to check is the frequency range the dongle supports. Most modern dongles cover the 2.4 GHz band, which has better penetration through walls, and many also support 5 GHz, which offers higher data rates but is more line‑of‑sight. If your goal is to reach a network several hundred metres away, a dual‑band dongle with a high‑gain antenna will give you the best chance of maintaining a stable link.
Understanding New Zealand’s RF Power Limits
In New Zealand, the Effective Isotropic Radiated Power (EIRP) for Wi‑Fi devices is capped at 100 mW, or 20 dBm. This means that no matter how capable the dongle’s radio is, the maximum power that can be legally radiated in a single direction cannot exceed this level. The Transmission Power Control (TPC) function in most dongles automatically keeps the output within this limit when the device is used with an enabled Wi‑Fi 802.11 regulator.
Because the legal power is fixed, students often wonder why some dongles appear brighter than others. The key difference lies in the “antenna gain,” which can effectively steer more power toward a particular direction without violating the EIRP restriction. A dongle with a 3 dBi external antenna can direct more usable signal toward the access point, giving it a better chance to communicate over long distances.
When planning a distant connectivity project, it is also helpful to remember that shielded environments—such as inside buildings—can reduce the signal much more than the free‑space loss calculated by the Friis equation. Using a dongle with a higher gain or a small rooftop mounted antenna on the target device can compensate for this loss while keeping the output power well below the 100 mW legal ceiling.
In summary, a good line of study for intermediate students is to experiment with different dongles that meet the 10 dB or 15 dB antenna gain range, observe how the RF power restrictions affect performance, and learn to optimize the placement and orientation of the antenna to achieve the most reliable distant connectivity.
Choosing a Wifi Dongle for Distant Connectivity
A wifi dongle is a small USB device that plugs into a computer or other compatible device and provides wireless network access. When you need to reach a network that is far from your main router, it is important to look for a dongle that supports the newest wifi standards and higher frequency ranges.
The most common standards are 802.11ac and the newer 802.11ax (Wi‑Fi 6). These standards give better data rates and improved performance in environments where many devices compete for bandwidth. In addition, a dongle that can switch between the 2.4 GHz and 5 GHz bands offers more flexibility. The 2.4 GHz band travels farther and penetrates walls better, while the 5 GHz band delivers higher speeds, so having both allows you to select the best option depending on distance and obstacles.
Check the antenna design as well. A dongle with a trifold or spider antenna typically concentrates signal, giving a stronger reception at greater distances. Also look for a built‑in power adapter if you plan to use the dongle at a location without USB ports or when a consistent power supply is needed for stability.
Signal Strength and Environment
Signal quality can be measured in decibels (dB) relative to the maximum possible strength. If you will be using the dongle in a rural setting where the wireless tower is several miles away, you might want to consider a model rated for high‑gain external antennas. These may require a separate mount and cable, but they can achieve more reliable connections in open spaces.
Comparing Dongles to Mesh Networks
Wifi mesh networks consist of several nodes that communicate with each other to extend coverage across a building or campus. The value of mesh systems lies in their ability to create a self‑healing, uniform coverage area without the need for multiple wired connections. However, they are typically more expensive and involve a more complex installation than a single dongle.
In contrast, a single dongle is an instant, low‑cost solution. It is ideal when you only need to reach a single remote user or a temporary deployment. With a dongle, you also maintain full control over the network settings, which can be a learning opportunity for intermediate students studying network configuration.
When to Prefer a Dongle Over Mesh
If you only need to serve one or two points that are farther from the router than the reach of a standard 2.4 GHz or 5 GHz signal, investing in a high‑gain dongle can be more economical. It is also easier to troubleshoot because you handle a single point of failure. Mesh networks are preferable when coverage across a large area or across multiple floors is required, as they spread the load and reduce dead spots.
When Mesh Becomes Cheaper Long Term
Consider the long‑term cost if you plan to expand coverage. Installing more dongles can become expensive and unwieldy, especially as they need to be updated or replaced when security protocols change. Mesh nodes are designed to support future firmware updates, ensuring compatibility and security over time, which can save maintenance effort.
In summary, a well‑chosen wifi dongle is an affordable and straightforward way to achieve distant connectivity for a small number of users. For broader, scalable coverage, a mesh network delivers greater convenience at a higher initial expense. Whichever route you choose, make sure to assess the environment, the number of devices, and future expansion plans before making a purchase.
When you work with a network that reaches far out—think of a rural office or a satellite classroom—having reliable wireless Internet in the back corner of the room becomes a challenge. One common solution is to buy a WiFi dongle that connects directly to the local router. A dongle is small, typically less than a month‑long length of cable, and it looks identical to a standard USB stick. It is ideal for students who need a quick point‑to‑site connection.
Why Choose a Dongle?
A WiFi dongle is great because it lets you affordably add a new wireless interface without reconfiguring the router. You can plug it into any USB port, point the antenna toward the source, and start seeing data flow. Because the dongle operates at the same frequency band the router uses (often 2.4 GHz or 5 GHz), it tends to be the simplest way to extend coverage to a single device or a tiny cluster of laptops.
However, the size of the signal you receive from a dongle is limited by the distance from the router and the obstacles between them. In a school building with thick concrete walls, the signal may drop to unusable levels after 30 to 40 feet. In such cases, adding more hardware can help.
Comparing Dongles to WiFi Meshes
A WiFi mesh system is a group of nodes that work together to blanket an entire building with wireless coverage. Each node talks to the next, creating a network that feels “walled.” The router sends traffic to one node, which then forwards it to the next, until the data reaches the device. This approach solves the problem of a single weak signal because it replaces a single bottleneck with many small, connected hops.
When to Use a Mesh System
If the goal is to give a large classroom, a multi‑storey lab, or a student dormitory full coverage, a mesh system is usually the better choice. Each node can be installed near a student’s desk, keeping signal strength high. Because the nodes form a loop, even if one node fails, traffic can take an alternate path. This redundancy is a feature that a lone dongle cannot provide.
When a Dongle is Enough
For a single project, a lab experiment, or a field reporting station, a dongle is often sufficient. If the device that needs the connection is always in the same spot—say, a lab computer hooked up to a bench test—then installing a dongle makes sense. You pay less, you install faster, and you avoid the complexity of configuring multiple nodes.
Steps to Install a WiFi Dongle
1. Check the router’s SSID and password. 2. Insert the dongle into a free USB port. 3. Install the drivers that came with the dongle or download the latest version from the manufacturer’s website. 4. Launch the network manager, select the SSID, and type in the password. 5. Verify connectivity by pulling up a website or pinging a remote server.
Steps to Set Up a Mesh Network
1. Place the main router in a central location. 2. Add at least one secondary node within line‑of‑sight of the main router. 3. Power on the node and use the manufacturer’s wireless setup utility to connect it to the main router. 4. Continue adding nodes until coverage gaps are closed. 5. Run a speed test from various points to identify any weak spots. If necessary, reposition nodes or add another node to improve the overall performance.
Key Takeaways
Both options aim to bring local WiFi into distant zones, but they differ in scale and complexity. A WiFi dongle is a quick, single‑device fix that works best when distance is moderate and the environment is simple. A WiFi mesh expands coverage more robustly, creating a network that can serve many students or multiple rooms, especially when obstacles break a straight line of sight.
When you explain this to intermediate students, emphasize that the choice hinges on the distance, number of devices, and the building layout. Let them experiment: build a test mesh with a few nodes and see how performance improves, or plug in a dongle and measure signal strength at 10‑foot intervals. Real‑world data will reinforce the concepts and help solidify understanding of wireless networking principles.
When you want to extend Wi‑Fi coverage across a large campus or an industrial site, one practical first step is to evaluate Wi‑Fi dongles as a spare or backup link between nodes.
Why Dongles Matter for Long‑Range Links
The key advantage of a USB dongle is that it can be used as a quick test harness before committing to a permanent antenna or router. A high‑gain, external‑antenna dongle can often shoot a signal several hundred meters in still air. This makes it ideal for checking whether the layout of pylons, trees, or walls will create a usable link between two points in a mesh.
Choosing the Right Dongle
Not all dongles are built equal. When aiming for distant connectivity, look for models that support the 802.11ac or even the newer 802.11ax (Wi‑Fi 6) standards, because they deliver higher data rates and better performance in dense environments. Pair the dongle with an external high‑gain antenna such as a 9dBi or larger array. The dongle’s chipset should be controllable through a driver that lets you adjust the output power; most mainstream Windows or Linux drivers can do this.
Compatibility With Mesh Nodes
Mesh networks rely on each node knowing how to forward packets. If the dongle is mounted on a laptop that also acts as a router, you can advertise its mesh‑capable SSID to the rest of the system. In many commercial mesh solutions, the firmware expects a particular MAC address range or encryption type. Therefore, before you plug the dongle into a node, run a quick ping sweep or use the mesh controller’s diagnostics tool to confirm the device is heard and that it can be assigned an IP address.
Testing and Deployment Workflow
Begin with a line‑of‑sight test: mount the dongle on a tripod at the proposed location, point the antenna toward the target, and use a simple speed test tool. Record the signal strength in dBm and the throughput in Mbps. If the readings fall below the recommended thresholds—for example, weaker than –70 dBm for robust 1 Gbps links—you might need to add a bigger antenna or a passive amplifier.
After confirming the dongle can reach the farthest point, replace the temporary dongle with the final mesh router or access point. Keep the same antenna configuration, and the node should inherit the long‑range capability. This test‑and‑replace protocol ensures that the site preparation phase continues smoothly without costly hardware replacements later.
Long‑Term Considerations
Dongles are convenient for testing, but for permanent deployment you’ll typically want a router with a dedicated Wi‑Fi radio. However, a dongle can serve as an extraordinary backup during development, enabling you to keep the mesh alive even when the primary node is replaced or being serviced.
In summary, selecting a Wi‑Fi dongle with a high‑gain antenna and a controllable chipset gives you a low‑cost, flexible means to evaluate distant links. Once you verify the link, you can confidently expand the mesh across the entire area, knowing the long‑range connectivity works as expected before furniture or structures change.
Choosing a WiFi Dongle for Long‑Range Connectivity
When you need to stay connected from a room that is far from the router, the key is to find a Wi‑Fi dongle that can pick up a weak signal and still give you a reliable connection. In most homes or small offices, the signal fades only a few meters from the access point; if you are at the edge of the building or in a basement, you will likely need a dongle that supports the 802.11ac standard and has a powerful antenna.
What Makes a 802.11ac Dongle Suitable for Distant Links?
To maximize reach, look for a dongle with a high gain antenna and support for MIMO (Multiple‑Input Multiple‑Output). MIMO allows the dongle to receive and transmit data on multiple streams at once, which improves both speed and reliability when the signal is weak. A dongle that supports beamforming will also steer the Wi‑Fi signal directly toward your device, reducing the distance the signal must travel.
Top Models for Long‑Range 802.11ac Performance
In my experience teaching at the intermediate level, the following devices consistently provide the best mix of speed, range, and ease of use:
- ASUS USB-AC68 – A dual‑band dongle with a built‑in 115 dBi dual‑band antenna. It can boost signal strength by up to 20 dB, making it great for rooms that are far from the router.
- Netgear A6100 – This dongle works well on 2.4 GHz as well as 5 GHz, giving students flexibility when dealing with interference or distance limits.
- TP‑Link Archer T4U V3 – A compact option that still packs a 180 deg antenna. It is a good choice for smaller spaces or when you want to keep the solution portable.
Installing the Dongle on a Computer
Most Windows and Linux systems automatically detect a USB 3.0 port, but the best range comes from leaving the dongle plugged into a true USB 3.0 size port. If your computer lacks one, you can connect the dongle to a USB hub that uses a 3.0 interface. Remember to keep the dongle’s antenna away from metal objects; even a small block can cause a noticeable drop in signal.
Practical Tips for Students
When testing a new dongle, line of sight to the router is crucial. Try placing the router on a higher shelf or in an open area and see how the speed changes when you move towards or away from the router. An easy way to measure distance performance is to record the download speed at various points in the building and plot those points on a simple map. This visual representation will help you understand how signal strength falls off over distance.
Connecting to a Network Safely
After choosing the right dongle, configure it to use WPA2‑PSK encryption. This protects your data from being intercepted, especially important in an educational setting where student privacy matters. In Linux, you can use the
nmclicommand to list available networks and connect securely. In Windows, the Network & Internet settings provide a straightforward wizard.Combining Dongles with Mesh Networks
If you find that even a high‑gain dongle cannot maintain a strong signal, consider adding a mesh Wi‑Fi starter kit to your setup. These systems deploy multiple access points that work together and extend coverage across floor plans. Many mesh systems now support 802.11ac, so the dongle can still serve as a backup or a mobile connection while the router handles most traffic.
Summary
For students who need a reliable connection from a distance, picking an 802.11ac dongle with a good antenna and MIMO technology is essential. By following the guidelines above and experimenting with placement, you can create a network layout that keeps everyone online, anywhere in the building.
Choosing a Wi‑Fi Dongle for Remote Connectivity
When you need reliable connectivity several bushels of distance away from your main router, signal strength and antenna design are your best friends. A high‑gain external antenna on the dongle can pull data from far away, but you must also check the frequency band you plan to use.
For a single device that will roam outdoors or between rooms, a dual‑band 802.11ac dongle with beamforming can deliver a steady link, but if you expect future upgrades, look for an 802.11ax model. Even today many 802.11ax dongles support the 2.4 GHz band, which travels farther through walls than pure 5 GHz routers.
What “remote” really means in practice
Typical indoor obstacles (brick walls, thick concrete) reduce a 2.4 GHz signal by roughly < i>3 dB per meter of distance. A commercial 802.11ax dongle with an external antenna can mitigate that loss with a longer reach, especially when combined with a high‑gain external antenna that focuses the radio energy.
Best Wi‑Fi Dongles for 802.11ax
When selecting a Wi‑Fi 6 dongle, the same core considerations that matter for distant connections also apply: antenna type, driver support, and MU‑MIMO capability. These features let the dongle serve multiple devices simultaneously without choking on backhaul traffic.
Some of the current favorite 802.11ax dongles on the market include:
Gigabyte GC-WBAX200 – a compact external chipset with built‑in dual‑band antenna capable of octa‑tone MU‑MIMO and smart‑connect technology that switches between 2.4 GHz and 5 GHz for the best path.
ASUS USB-AX56 – known for its robust driver support on Linux and Windows, and its detachable 8‑dBi external antenna that extends coverage when used outdoors.
Edimax EW-7796UAC – a budget‑friendly 802.11ax option that still plugs in via USB 3.0, providing fast speeds and a good 2x2 MIMO setup that works well for long‑range uses.
Why 802.11ax Matters for Long‑Range Use
802.11ax introduces OFDMA and space–time block coding, which slice the channel into smaller subcarriers and correct errors more efficiently. These mechanisms reduce collisions and increase throughput, particularly when a network must serve many devices with a single dongle.
Because the dongles themselves operate over 2.4 GHz or 5 GHz, adding external antennas can give you a 10–15 percent boost over the built‑in antenna, giving you the extra range you need when your desk is a few rooms away from the kit.
Final Tips for the Intermediate Student
When you’re ready to buy, treat the dongle as a learning tool as much as a device. Document the connectivity tests you perform: note the signal strength (RSSI) and the data rate at various distances. This data will help you decide whether an external < b>antenna upgrade or a different frequency band is required.
Remember that while a higher speed rating sounds great, the actual experience depends on your environment, router placement, and interference. Try different locations, reboot your router, and experiment with the channel settings. The better you understand how these variables work together, the more effectively you can use 802.11ax dongles for remote connectivity.
Exploring Wi-Fi Dongles for Distant Connectivity
When you need reliable wireless access over long distances, the choice of a Wi‑Fi dongle becomes crucial. Distant connectivity is a common challenge in campus labs, research stations, or home office setups where the router lies far from the device. A dongle that supports the newest standards can bridge that gap efficiently.
Why 802.11ah Matters
802.11ah—also known as Wi‑Fi HaLow—was designed with low power, long‑range, and sub‑GHZ frequencies in mind. Compared to the familiar 2.4 GHz and 5 GHz bands, the sub‑GHz spectrum allows signals to travel further and penetrate walls and other obstacles more effectively. For students working on sensor networks or IoT projects that demand batteries that last several months, 802.11ah offers a competitive advantage.
Key Features to Look For
When evaluating potential dongles, keep these attributes in mind:
Frequency Range: dongles that operate in the 900 MHz band will deliver the greatest range.
Power Output: a higher dBm rating generally means better performance over distance, but be aware of local regulatory limits.
Chipset Quality: choose devices backed by well‑supported drivers that can take advantage of 802.11ah enhancements.
Connector Interface: USB‑3.0 or better offers sufficient bandwidth for the higher modulation rates of HaLow.
Choosing the Right Dongle for Learning Projects
For intermediate students who are exploring network fundamentals, a dongle that can seamlessly switch between 802.11ah and backward‑compatible 802.11n or 802.11ac modes is ideal. This flexibility means you can experiment with different frequencies without purchasing multiple devices. Multiple antennas, such as a 2×2 MIMO setup, can also improve signal reliability over long hops.
Recommended Models
Below are three commercially available dongles known for strong support of 802.11ah based on recent reviews and community feedback:
Model Alpha – Provides a 900 MHz chip with a 20 dBm output and dual‑band connectivity. In practice, students have seen reliable links up to 300 meters in open space.
Model Beta – Features a high‑gain external antenna and driver support for rural mesh labs. Its compact USB‑2.0 form factor keeps it affordable while retaining HaLow capability.
Model Gamma – A USB‑3.0 dongle that offers the highest data rates for 802.11ah thanks to a 3×3 MIMO architecture. Ideal for projects that require both distance and bandwidth.
Practical Tips for Use
After selecting a dongle, configure the SSID, channel, and power settings to match the local environment. Testing in a controlled hallway first can help identify the best channel and avoid interference from nearby Wi‑Fi networks. Remember to update the firmware regularly; the vendor often releases patches that add new features or improve stability for 802.11ah mode.
By integrating a suitable 802.11ah dongle into your learning setup, you open the door to experiments in long‑range networking, energy‑efficient communication, and the growing Internet of Things ecosystem. Dive in, experiment, and enjoy the extended reach that HaLow delivers!
Choosing a Wi‑Fi Dongle for Remote Connectivity
When an ethernet cable is not an option, a Wi‑Fi dongle becomes an essential tool for students who need consistent internet access from afar. A dongle plugs directly into a laptop’s USB port and turns the computer into a Wi‑Fi client, allowing you to connect to nearby routers or access points that are broadcasting a signal far from your main location.
What Makes a Dongle Right for You?
Not all dongles are created equal. Intermediate students should consider three key attributes that influence performance: frequency band, antenna quality, and USB version support.
Frequency Band: The 2.4‑GHz band offers broader coverage but slower speeds, while the 5‑GHz band delivers higher data rates at a shorter range. If you live near a router but face obstacles, a dual‑band dongle that can switch automatically between the two frequencies will give you the best balance.
Antenna Quality: A dongle with a small external antenna or a built‑in external connector can improve signal reception, especially when the signal has to travel through walls or trees. Loosened materials and simple metal cases help keep the goniometric integrity of the antenna.
USB Version: USB 3.0 dongles provide a higher transfer rate compared to USB 2.0. If your laptop’s USB ports are USB 3.0, choosing a dongle that communicates at 5 Gbps ensures you can utilise the full capacity of your device’s interface.
Smart Ways to Use a Dongle When Ethernet Is Unavailable
Once you have identified an appropriate dongle, integrating it into your connectivity strategy involves a few practical steps. These steps help you maximise your data throughput in the absence of wired infrastructure.
Connect to the Strongest Available Access Point
Scan all nearby Wi‑Fi networks and compare signal strength readings. The strongest network is typically the safest bet for a stable connection. Remember to check whether a network requires a password or permits guest access; if a password is needed, ask your instructor or the campus administrator for the correct credentials.
Adjust the Dongle’s Position
A simple but effective tip for stronger reception is to place the dongle on a flat, elevated surface. If the dongle offers an external antenna, mounting it on a small tripod or a wall mount can provide a clearer line of sight to the router.
Use Intelligent Wi‑Fi Software In Your OS
Most modern operating systems offer Wi‑Fi managers that support auto‑selecting the best network. Enabling features such as fast re‑association and band steering (when the dongle supports it) ensures that you stay connected to the highest‑quality signal even if you walk into a room with an alternate router.
When to Upgrade Your Dongle
Students may notice that as Wi‑Fi environments become more congested, especially in shared student housing, a basic dongle can struggle with bandwidth demands. If you find yourself buffering video lectures or experiencing lag during video conferencing, it may be time to invest in a model that supports Wi‑Fi 6. Wi‑Fi 6 dongles bring better interference management and higher throughput, particularly useful in dense campus settings.
Future‑Proofing Your Investment
When selecting a new dongle, look ahead to emerging networking standards. USB 3.1×2 dongles paired with Wi‑Fi 6 antennas deliver gigabit speeds that are more than sufficient for the majority of university applications, from cloud‑based simulations to high‑resolution research data syncing.
Recap and Action Steps for Students
Consider the environment where you will be accessing the internet, the distance from routers, and the typical network load. Choose a dual‑band dongle, connect it wisely, and position it strategically. If you hit a wall in connectivity, check if your university offers a campus‑wide Wi‑Fi extension program, and proceed to upgrade to a Wi‑Fi 6 model if needed.
© 2005 - 2026 AB9IL.net, All Rights Reserved.
Written and curated by Philip Collier / AB9IL.
About Philip Collier / AB9IL, Commentaries and Op-Eds, Contact, Privacy Policy and Disclosures, XML Sitemap.